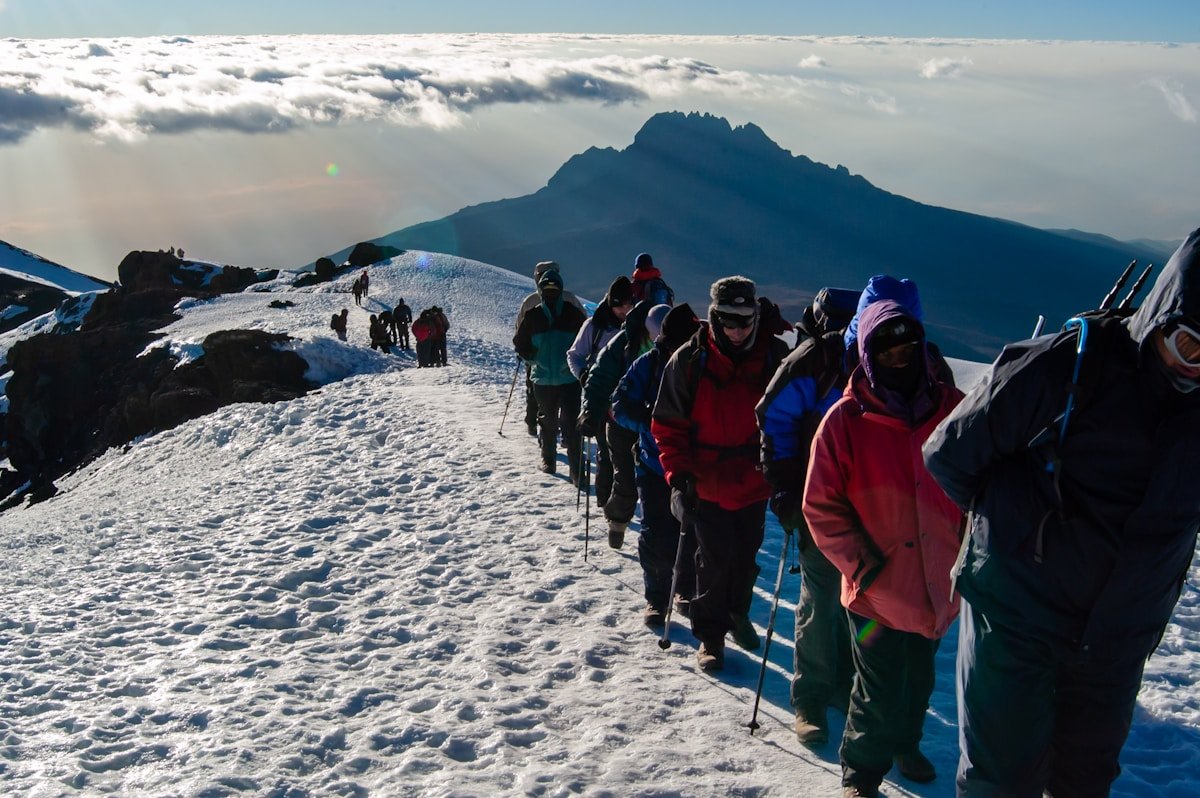
The Machame Route carries more climbers than any other trail on Kilimanjaro - roughly 40% of all trekkers choose it. That popularity is well earned. The six- or seven-day southern approach takes you through every ecological zone on the mountain, camps at dramatic viewpoints, and builds acclimatisation progressively through the “climb high, sleep low” technique. It is harder than Marangu but rewards you with better scenery, better acclimatisation, and a meaningfully higher summit success rate.
Difficulty: Moderate to challenging Duration: 6 days (minimum) or 7 days (recommended) Success rate: approximately 70–85% (7-day version closer to 85%) Approach: Southern face, via Machame Gate (1,809m) Summit gate: Stella Point (5,756m) → Uhuru Peak (5,895m) Descent: Mweka Route
Altitude Profile
| Camp | Altitude | Night |
|---|---|---|
| Machame Gate | 1,809m | Pre-trek |
| Machame Camp | 3,001m | Night 1 |
| Shira Camp | 3,840m | Night 2 |
| Lava Tower | 4,630m | (lunch, acclimatisation) |
| Barranco Camp | 3,976m | Night 3 |
| Karanga Camp | 4,035m | Night 4 (7-day only) |
| Barafu Camp | 4,673m | Night 4/5 |
| Uhuru Peak | 5,895m | Summit night |
| Mweka Camp | 3,100m | Night 5/6 |
| Mweka Gate | 1,650m | Descent day |
The climb high / sleep low pattern happens at Lava Tower: you push to 4,630m for lunch before descending to Barranco Camp at 3,976m. That single afternoon does more for your red blood cell count than any supplement.
Day-by-Day Itinerary
Day 1: Machame Gate (1,809m) → Machame Camp (3,001m)
Distance: 11km | Time: 5–7 hours | Gain: +1,192m
The trek begins at Machame Gate after a morning check-in and a pre-briefing from your guide. The trail enters Kilimanjaro’s montane rainforest immediately - dense, green, and often mist-covered. You may hear colobus monkeys in the canopy above. The path climbs steadily on a clear trail through mud and tree roots before emerging at Machame Camp on the southern rim of the forest zone. Views of the summit cone appear briefly at dusk.
Pole pole matters on Day 1. Many trekkers underestimate the distance and push too fast. Arrive at camp between 3–5pm, eat a full dinner, and hydrate.
Day 2: Machame Camp (3,001m) → Shira Camp (3,840m)
Distance: 5km | Time: 4–6 hours | Gain: +839m
A shorter day, but the terrain shifts dramatically as you exit the forest and enter the heath and moorland zone. Giant heather gives way to giant groundsel (Senecio kilimanjari) - the strange alien-looking plants that make Kilimanjaro’s mid-mountain unique on Earth. The Shira Plateau opens wide ahead of you, a flat ancient volcanic caldera. Camp at Shira Camp or Shira 2 Camp depending on your operator.
Day 3: Shira Camp (3,840m) → Barranco Camp (3,976m) via Lava Tower (4,630m)
Distance: 10km | Time: 6–8 hours | Gain/Loss: +790m / −654m
The most important acclimatisation day. You push across the Shira Plateau and up a rocky ridge to Lava Tower (4,630m) for a lunch stop. Altitude headaches are common here - this is the day many people first feel the mountain’s effects. After lunch, you descend 650m to Barranco Camp (3,976m). The descent feels counter-intuitive but is physiologically critical.
At Barranco Camp you have a view of the Great Barranco Wall - a 300-metre cliff face that you’ll scramble up tomorrow morning.
Day 4: Barranco Camp (3,976m) → Karanga Camp (4,035m) [7-day] or Barafu (4,673m) [6-day]
Distance: 5km to Karanga / 9km to Barafu | Time: 4–5 / 7–9 hours
The day starts with the Barranco Wall scramble - a memorable hands-and-feet ascent up steep rock ledges. It looks intimidating and is genuinely steep, but no ropes are required. Guides assist at exposed moves. Most people find it exhilarating rather than frightening. You reach the top of the wall in about 1–2 hours.
After the wall you traverse the southern cirque - a series of ridges and valleys with increasingly sparse vegetation. On the 7-day itinerary, you camp at Karanga Camp (4,035m) for an extra acclimatisation night. On the 6-day itinerary, you continue directly to Barafu Base Camp (4,673m) for a longer, harder day.
Day 5 (7-day): Karanga Camp (4,035m) → Barafu Camp (4,673m)
Distance: 4km | Time: 3–4 hours | Gain: +638m
A relatively short acclimatisation day - intentionally so. Arrive at Barafu Camp by early afternoon, rest, eat, hydrate. Your guide will deliver a pre-summit briefing: wake time (typically 11pm–midnight), gear check, weather conditions. Sleep is difficult above 4,500m, so do not stress if you lie awake for hours.
Summit Night: Barafu Camp (4,673m) → Uhuru Peak (5,895m)
Distance: 5km | Time: 5–8 hours to summit, 3–5 hours descent to Barafu
Wake at 11pm to midnight. The summit push begins in darkness, cold (−15°C to −25°C not unusual at the crater rim), and thin air. The trail zigzags upward through volcanic scree and rock - a relentless slog that tests mental resolve more than physical fitness.
Stella Point (5,756m) is the first landmark on the crater rim. Many trekkers weep or feel overwhelming emotion here - it’s the point where most guide companies confirm you’ve “reached the summit” for certification purposes. But Uhuru Peak is another 45–90 minutes’ walk along the crater rim.
Uhuru Peak (5,895m) - the highest point in Africa. Sign the book. Take the photograph. The view from the crater rim extends across hundreds of kilometres of Tanzanian plains and - if visibility is right - to Mawenzi and beyond. You’ll spend 15–30 minutes at the top before descending.
The descent to Barafu (scree-running where the surface allows) takes 3–4 hours. After a brief rest and lunch, you continue down to Mweka Camp (3,100m) for your final night.
Final Day: Mweka Camp (3,100m) → Mweka Gate (1,650m)
Distance: 9km | Time: 3–4 hours | Loss: −1,450m
Knees take punishment on the descent through the rainforest on rough trail. Trekking poles are invaluable. At the gate you receive your summit certificate, tip guides and porters, and meet your transfer vehicle.
Difficulty and What Actually Stops People
The Machame Route is steep in places - the Barranco Wall, the summit push - but the technical difficulty is minimal. What stops people is altitude sickness, primarily above Barafu. The 6-day version pushes acclimatisation harder and carries a meaningfully lower success rate than the 7-day. If you can afford the extra day, take it.
The honest odds: Summit success on a 6-day Machame runs approximately 65–75%. On 7 days it climbs to 80–85%. The difference is one extra night at Karanga.
Named Operators and Prices (as of 2026)
All prices are per person in a group of 2–4. Solo trekkers typically pay 15–25% more.
| Operator | 7-Day Price (approx.) | Notes |
|---|---|---|
| Zara Tours (Moshi) | $1,800–$2,200 | Long-established Moshi operator; budget option |
| Roy Safaris (Arusha) | $2,400–$2,900 | Strong mid-tier; KPAP registered |
| Altezza Travel (Moshi) | $2,500–$3,200 | Tech-forward; real-time GPS tracking |
| Kilimanjaro Experts (Moshi) | $2,200–$2,800 | Smaller groups; experienced guides |
| Thomson Safaris (US-based) | $4,200–$5,500 | Premium; private camps; US-based support |
Prices include all park fees, guide and porter wages, meals, and camping equipment. They do not include flights, Tanzanian visas, sleeping bags, or tips. Ensure your travel insurance covers altitude trekking to 5,895m before booking.
Browse Kilimanjaro Machame Treks on GetYourGuide
| Tour | Duration | Approx. Price (per person) | Book |
|---|---|---|---|
| Kilimanjaro: 7-Day Machame Route Hiking Tour | 7 days | from approx. USD 2,200 | Book |
| Machame Route: Kilimanjaro Climb (7 Days) | 7 days | from approx. USD 1,850 | Book |
Prices as of 2026. Both listings include park fees, guides, porters, and camp meals. Verify individual inclusions before booking — some budget listings exclude sleeping bags and crater crew fees. Browse all Kilimanjaro treks to filter by route, duration, and operator rating.
Acclimatisation Tips
- Walk significantly slower than feels natural - “pole pole” is the literal strategy
- Drink 3–4 litres of water daily even if you do not feel thirsty
- Eat full meals even if altitude suppresses your appetite; carbohydrates are your primary fuel
- Diamox (acetazolamide) 125–250mg twice daily from Day 1 reduces AMS risk - consult your doctor
- If you have a headache, inform your guide; most headaches resolve with hydration and rest
- Never ascend with worsening AMS symptoms - descend
Packing List Essentials
Layering system:
- Moisture-wicking base layer (long sleeve)
- Midlayer fleece or down jacket
- Hardshell waterproof jacket + trousers (summit night essential)
- Insulated down jacket (summit night; −20°C rated)
Lower body:
- Trekking trousers (convertible zip-offs useful in the forest)
- Thermal tights or base-layer trousers
- Waterproof over-trousers
Footwear:
- Broken-in waterproof hiking boots with ankle support (B1 or B2 stiffness if you plan to use crampons, though crampons are not required on Machame)
- Camp sandals or crocs
Head and hands:
- Balaclava or neck gaiter
- Warm beanie
- Thin liner gloves + insulated outer gloves or mittens
- Sun hat and high-SPF sunscreen
Equipment:
- Trekking poles (essential for the Barranco Wall and summit descent)
- Headlamp + spare batteries (summit night is in the dark)
- 3-litre hydration bladder or water bottles with insulating sleeves (water freezes above 5,000m)
- Sleeping bag rated to −15°C (rentable from most operators)
Medications:
- Diamox (consult your doctor in advance)
- Ibuprofen and paracetamol
- Blister plasters
- Rehydration sachets